In this Image masking tutorial, we are presenting the universal way to do photo masking in Adobe Photoshop. Image masking is applied to correction every portion on an image in a specific colour. It is well known as changing the background, with accurate pixels without any blur. There are a few types of masking such as hair masking, fur mask, shadow mask etc. In comparison, you can apply it with different layers. This digital era, eCommerce company grabs the whole internet market. Day to day image editing services improve the eCommerce services and sells rate. There is a tremendous advantage of its professionally growing business. Photo editing is essential for eCommerce, indeed. For image editing, we are mentioned a few software and in this content, let's check out the primary tool in Photoshop.
This Tutorial Page
1. How to Do Image Masking in Photoshop
Photoshop masking technique is used to remove background especially for hair, fur, etc. There are several masking processes apply in Photoshop. Here, one of the image masking operations is discussed. We mentioned how to run Photoshop software in our clipping path tutorial, so we are escaping that part here.
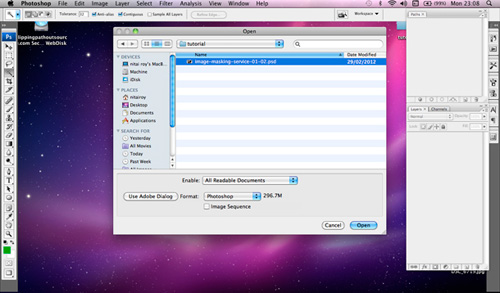
Open a model image that has hair where you can do masking. Go to File Menu to open. You should have a clear understanding that when we should follow Photoshop Masking technique because clipping path and image masking both applies to remove the background. We will only do Photoshop Masking when an image has hair, fur, wool, etc. while doing clipping path is not possible using Pen tool manually.
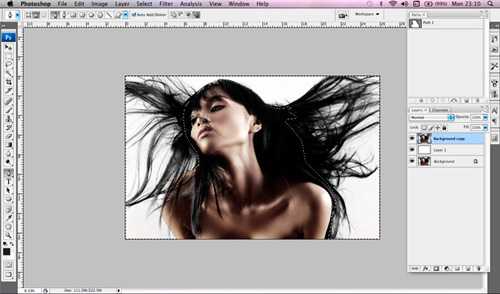
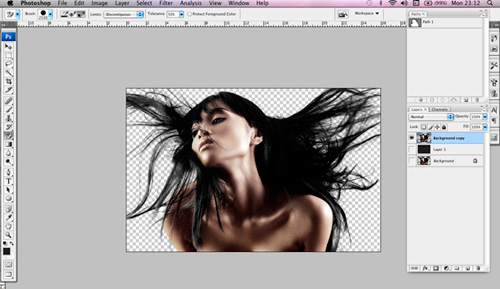
Steps: Initially, we do clipping around the body and the dark hair area until the background is invisible throughout the hair part. After that make a copy of the original background layer thereby, the main image will be untouched. Select the original background image and go to Layer palette in the second right site icon and click. We created another duplicate layer. See the screenshot.

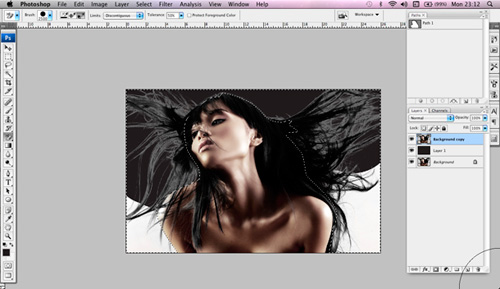
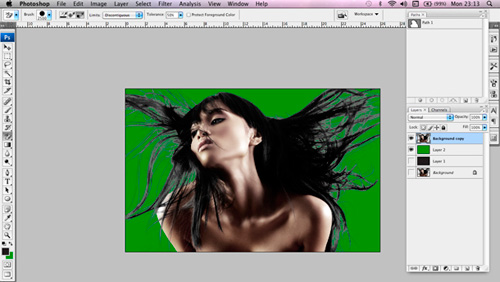
Now, select the path and inverse the selection. You will see both path area and the order are selected. You need to click on eyedropper tool, or you can select it by pressing control or Command+I on the keyboard. Choose the background area which you want to remove and then select the eraser tool in the second option of eraser palette. You need to click on the selection area and drag every corner. You have to continue erasing the background all over the background. The image will look like the screenshot background.
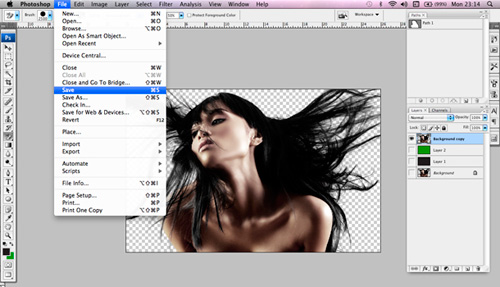
Finally, you can save the file as in transparent background for future use on a different color background.
This Photoshop model masking method is a one of the masking technique we use. Recently many components of Photoshop software are using for mask out the image, but Photoshop masking is still unbeatable because It provides the best quality for model masking.
If you have any question regarding our masking tutorial or other clipping mask, image retouching, image manipulation, image editing, shading, mirror effect or other Photoshop services, please feel free to Contact Us.
2. Photo Editing Services To Improve E-commerce Service
eCommerce or Electronic Commerce can include online shopping, online payment, mobile or internet marketing, internet banking, and Electronic Data Interchange. Now, many people will think that what is the use of photo editing services to improve e-commerce services. The e-commerce market is base on photo editing services. Many of you will disagree with my statement, but it is the truth. We all have been fond of online shopping. If you like a product just by seeing it online, then who should be given the award for the picture of the product you liked? If you will not find the image attractive, will you buy it? The model attracts us so much that we want to click on the buy button.
2.1. How is image editing related to eCommerce?
We need image editing in the e-commerce field. When we find an image so attractive in just one look, then you have to thank the photographer and the editor who photoshopped it. Just look at the real and photoshopped image.
Real image:
Photoshop Image: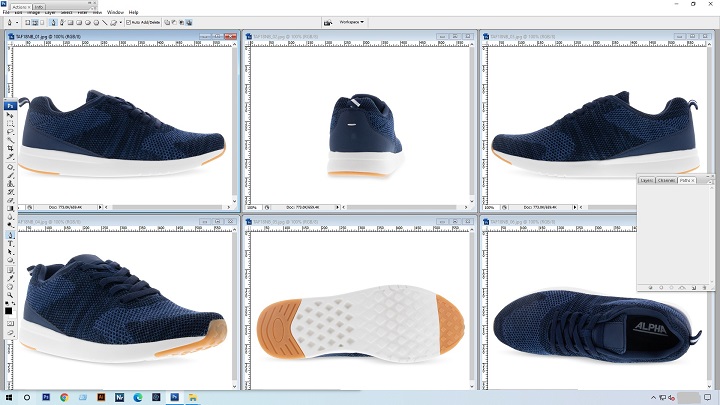
Look at the photoshopped image, it's just for an example. As the consumer can see, the image will look different. We have seen the photos of a shoe, where we can find that the shoe's picture will be taking from every angle. With these types of photography skills and editors, we can surely make our product outstanding.
2.2. Advantages of The Photo Editing Services in Ecommerce Photo
After the photo editing and retouching of the product image by the eCommerce photo editing service, it should submit in an online E-commerce website. It is necessary that your image should look presentable, and should remove the unwanted background so that your vision will get all the required attention.
You can change the image features like:
1. Give a 360° view.
2. Zoom in feature
3. Get a bigger image
4. High-resolution images
5. Add image with context
6. Visualize the model for the visitors
7. Can add more than one picture of the product
2.3. Other professional photo editing software:
We need to adopt the new, updated, fresh photo editing software which can enhance our vision. Some photo editing software has proved to grab the attention of the users with their unique features.
Some of them are:
1. Adobe Photoshop
2. CyberLink Photo Director 8 Ultra
3. MacPhun Luminar 1.0
4. Phase One Capture One Pro 10
5. MacPhun Creative Kit 2016
6. Serif Affinity Photo
2.4. How Will Photo Editing Services Will Help Your Ecommerce Business?
Nothing will stop your product from getting famous if you have excellent content and an effective outcome. But the visitors will pay a lack of attention if your product is not that much attractive. If the image is a dull or blurred one, then forget about buying your product, none will give you the attention even if your product is an effective one. Nowadays, competition is very high. Let's not forget that there so many competitors who have the same features as our product features. So, with these image editing services, you can make your picture more unique. Photo editing services are money and time-saving. You have to hire a professional editor or can learn on your own. You have to remember that in the online business world, everything is accepted online, not by looking face to face. So, the product should be near to perfect to catch the eyeballs.
3. 4 Basic Photo Editing Tool in Photoshop for E-Commerce
You can find many pictures which are so attractive. Sometimes it is due to its natural beauty, but sometimes it entirely depends on the photo editing techniques. There are 4 basic step processes to get an image with the methods of Photo editing tool. Let's focus on the steps:
1. Image Rotating:This feature helps in rotating the image left to right, horizontal, vertical and vice versa click on the Image -> Image Rotation -> Rotate 180° or 90°.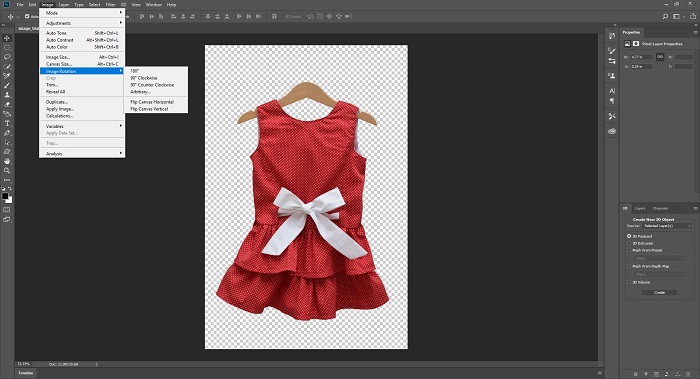 2. Image Cropping: Cropping is one of the best features which we need in our life as well as image. By cropping the image, you can cut all those unwanted backgrounds. Click on the Crop Tool from the side toolbar. You can see eight tabs will appear around your image. You can drag the costs on your vision to create a cropped image.
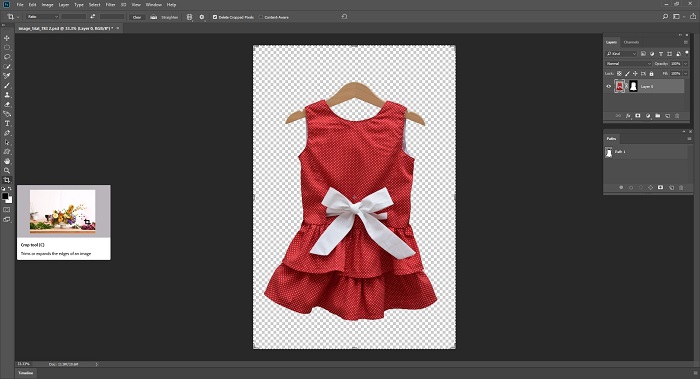 3. Correct the brightness: To adjust the intensity of your image, you have to click on the Layers -> New Adjustment Layer -> Brightness/Contrast. In this way, you can quickly increase or decrease the brightness or contrast of the picture. You have to adjust the slider according to your desired look. At last, click on the OK button.
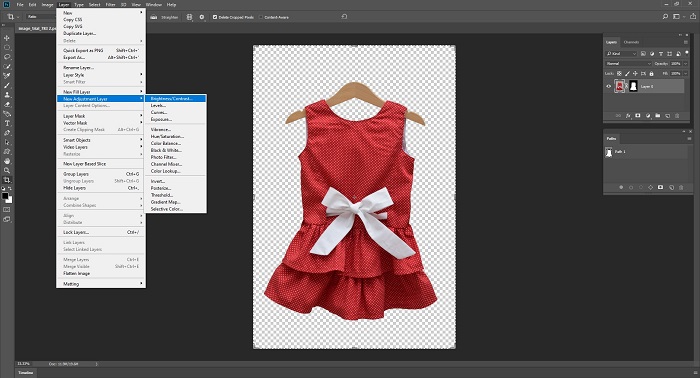 4. Correct the colour effects: The best way to enhance the pictures of the colour effects it is necessary to use the colour effects. You have to click on the Image -> Adjustments -> Colour Balance. You can adjust the Yellow-Blue, Magenta-Green, Cyan-Red balance. Then click on the OK button.
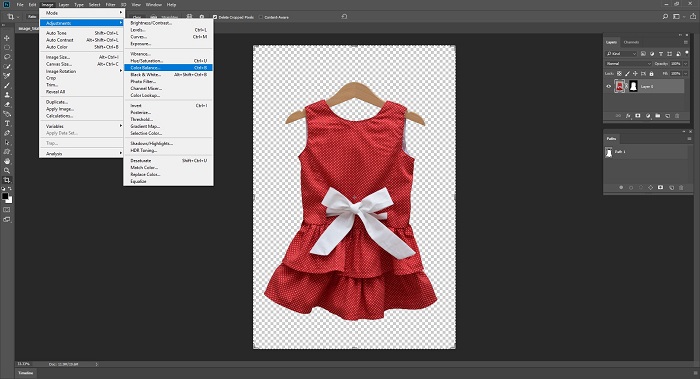
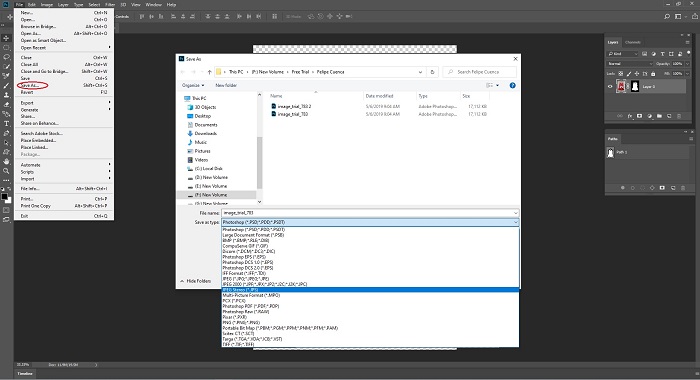
Let's See How To Save An Edited Image:
Now, if you are happy with your masterpiece, then you can save as we always keep the file in Photoshop, just by going in File -> Save As -> Save as Desire Type.
.PSD (Photoshop Data File): We can consider the best type of image file type, which allows you to exchange the present images for the next modification. In .PSD, you will notice that everything is customizable. Note: We recommended that if you want to create a copy in which you want to make the changes in the future.
.TIFF (Tagged Image File Format): Which is the right choice if you want to publishing or printing industry. It is support differnt type of data compression.
.JPEG (Joint Photographic Experts Group): This file type allows you to save the file or your image as a virtually uncompressed JPEG quality. For the web works, you have to consider increasing the compression and reducing the resolution. Through this way, you can easily create a high image of your product. See, it doesn’t matter to most of the customers whether your product is valid or not. For customers, Keep in mind that the first impression is the last.