This Page
- 1. Original Background To Transparent Background
- 2. How to use the Background Removal tool in Adobe Photoshop CC?
- 3. Best App for Background Remove or Change Background in 2020
- 4. Best Photo Editing Tool to Cut Out Background Instantly
- 5. Do You Know How to Remove Background Automatically With Photoshop?
In the Photoshop Clipping tutorial, we learned how to do clipping path around a subject of an image. Now We will find out how to make the background transparent selecting that clipping path to use the item in any design without its background but only the image. Alternatively, we will learn how to make the background pure white.
1. Original Background To Transparent Background
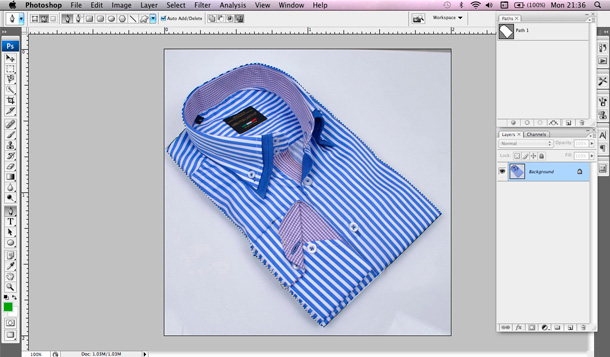
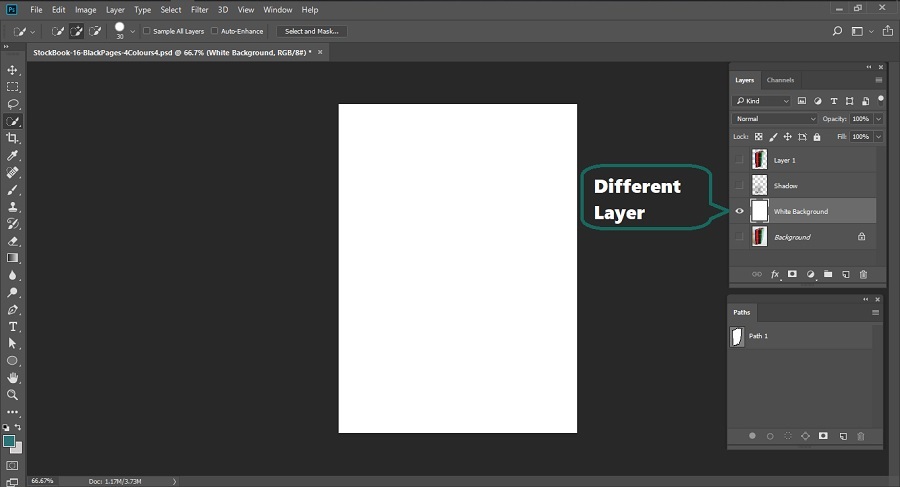
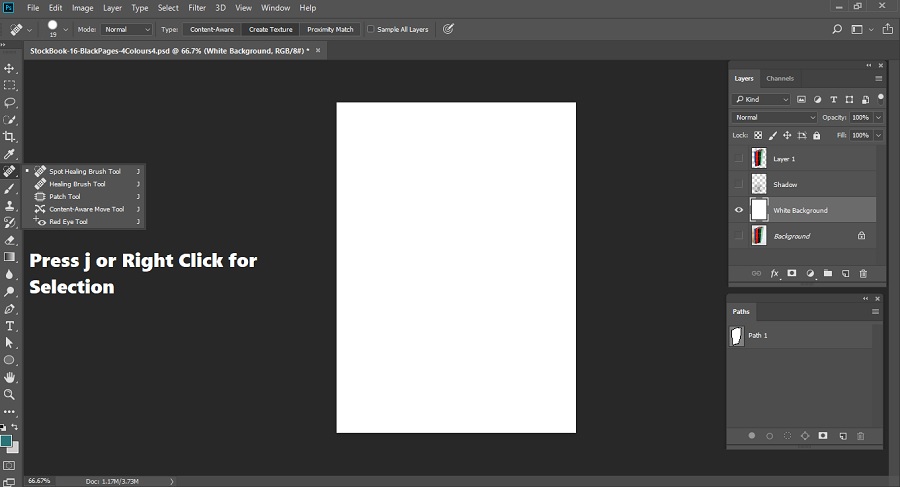
Select the Path 1 and press (e.g. command+click for Mac and Control+Click for Windows) to path. Now you can see the Path is kind of dot moving around the image means the Clipping Path is done accurately and selected.
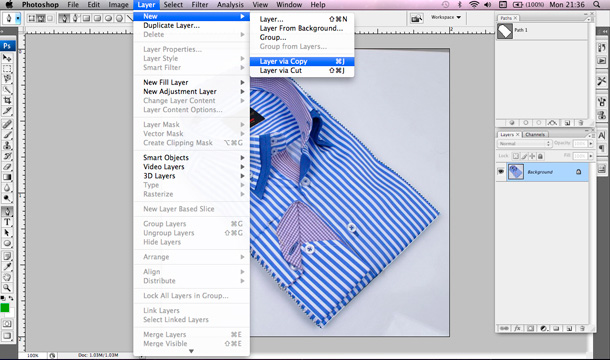
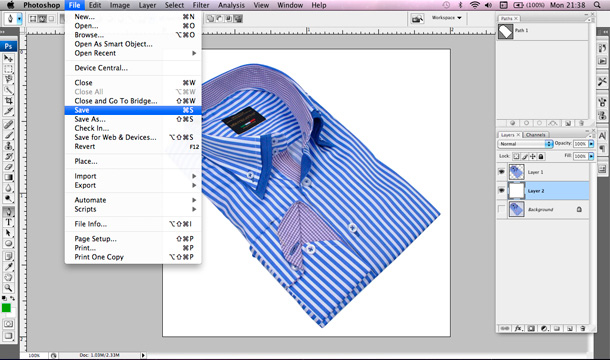
Select the Layer menu+new+layer via copy as the below screenshot.
The image on the second transparent background layer.
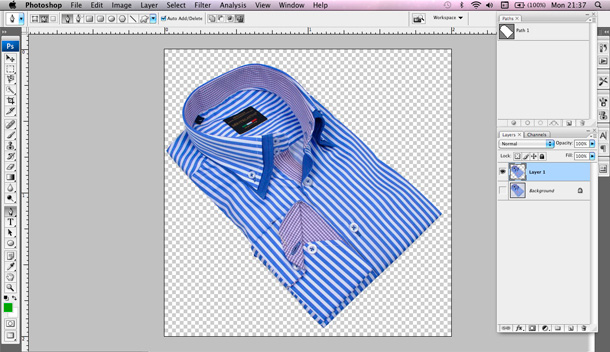
You can save the file as a transparent layer in the .psd format. Or
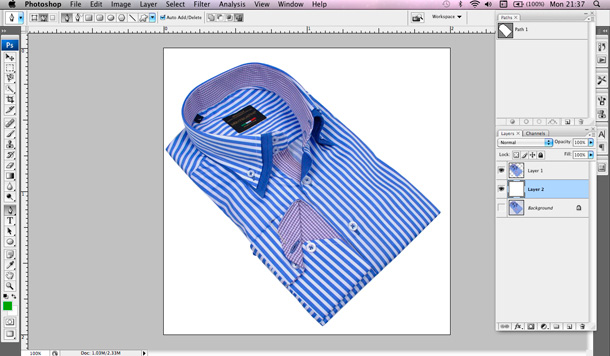
Copy or create another layer in the same way.
Adding pure white colour as a background need to be clicked to set the background colour from tools pallet.
Finally, save the image from the File menu to save. You will get options to select your file format. Choose the file format you need. For this tutorial, we decided .jpeg file format.
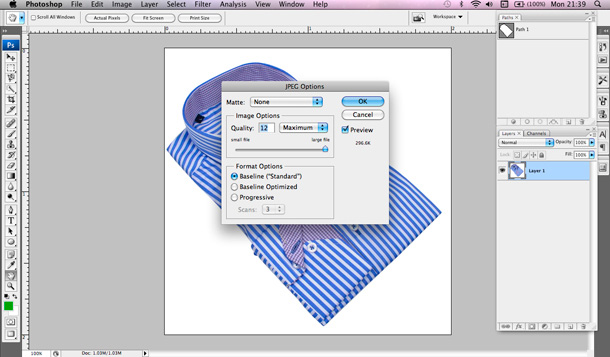
There will be another pop-up window "JPEG Options" keep the same settings (e.g. this option shows the quality of the image, you can change its quality) and just click the Ok button.

I hope, this very basic tutorial will help you to understand how to make a background purely white or transparent after clipping path. Nowadays E-commerce websites are mostly using the white background image of their product so you can try it as well. However, if you want us to do any Photoshop services for you, then you can send a Free Trial request. We will try our best to serve you.
2. How to use the Background Removal tool in Adobe Photoshop CC?
Photoshop is the number one tool that can remove the background from the picture quickly. For the simple experiences, you have to select and delete the history using the standard Magic wand tool. For a more complicated background, you have to use the Background Eraser Tool.
It is not easy to understand background removal techniques. You have to learn how to use photoshop. For every work, it takes time. Let’s focus on the steps on how to use the background removal tool easily.
Steps:
- Choose your Image: First thing first, choose a picture in which you want to change the background. Open it in Photoshop.
Click on the Background Eraser Tool:
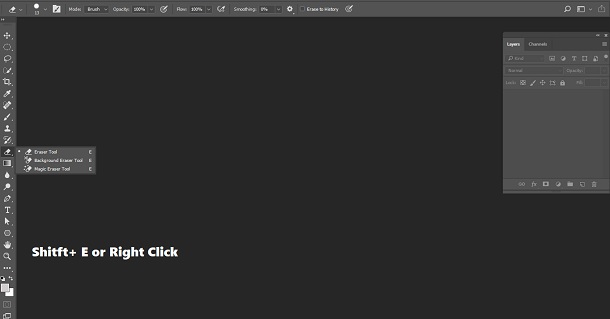
- You can see the Photoshop toolbox, select the Background Eraser Tool as mentioned below:
- Search for the background eraser tool, it is said under the Eraser tool or holds it until it shows the option. Otherwise, you can press Shift+E so that the eraser tool appears automatically.
- Look out for your Tools:
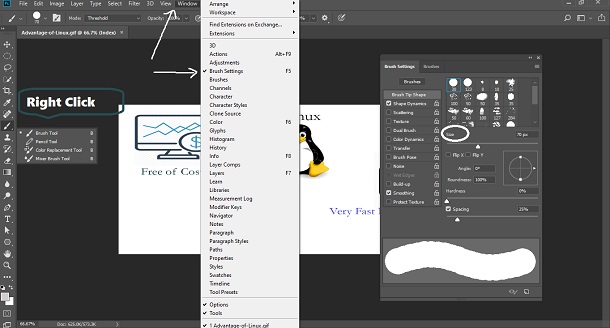
- You can select a harsh round brush, which you can see at the top of the screen. Choose the brush size as regarding your use.
- For a quick scaling of your brush size, you can use the square bracket key ( [or] ). In other options to change the hardness of the brush, you can right-click your mouse anywhere on the artboard.
Start with the erasing:
- For erasing, the first thing is to bring your brush to that area where you want to delete the background. Look for a brush size circle with small crosshairs in the centre.
- These crosshairs delete the area wherever it appears in the brush area and shows the “hotspot.”
- Keep in mind to zoom up your work area, as you have to keep the edge of the foreground to maintain the crosshairs from overlapping.
Go with the sampling setting and choosing a practical limit:
- Background eraser tool has that kind of magic that can even erase such fine lines like a single strand of hair.
- Adjust the sampling and limits that share the colours with the background. Like, e.g., if you are setting the limits to Discontinuous and tolerance to 5%.
Go with the Pen Tool or Quick mask:
- In the areas of wrongly erased foreground subjects, the image is straightforward when the background colours and foreground are different.
- If you are willing to delete the unwanted background and to clean the selection, it is best to use the Photoshop Pen’s tool.
With the rise of photoshop in the world, most of the complex problems of pictures have resolved quickly. Some images have a blurred or a bad background. Furthermore, with the use of a background erase tool, you can add any knowledge to your image. Don’t forget to save the picture as a PNG form to maintain the transparency, if you are keeping the image without adding a new background.
3. Best App for Background Remove or Change Background in 2020
With a lot of varieties in every field, there are varieties in apps also. And the types come in the image editing apps too. With hundreds of apps in the market, the image editors are confused about what to use and what not to. There are many examples of apps like:
- Wondershare Fotophire Editing Toolkit
- Corel Paintshop:
- Photoscissors
- GIMP
- Super Photo cut(Mac)
These are all the best apps that are used in 2020. But to be very honest, the best app which is used and known to everyone is "Adobe Photoshop." There are very few people who don't know about photoshop. It is known to everyone. In the sector of web designing and graphic designing, it has created a different image. Let's know more about this best app, which is used in removing the background.
3.1. Kind of the background removal apps:
Photoshop is the best and the original king among the background removal apps and photo editing world. Due to its endless features, there are so many books written on photoshop and its version. From being a simple editing tool to a background remover, it can provide amazing effects in the image.
This photo is capable of creating ghost mannequin effects, creating image templates, and adding drop shadows. Let's see how it works:
1. Working of Eraser tool:
- An eraser tool is a wonderful tool which has the power to either change the background colour or to be transparent.
- The pixel changes to transparency or the background colour, if you are working on a background with transparency locked or in a layer.
2. Pencil tool auto erasing technique:
- If you want to paint the background colour over the areas containing the foreground colour, then the auto-erase option of the pencil tool is all that you need.
- You have to specify the background and foreground colours, select the pencil tool, and then click on the auto-erase on the options bar.
3. Magic eraser tool to change the pixels:
- All similar pixel changes to transparent when you click in the layer with the Magic Eraser Tool.
- The pixel changes to the background colour, if you are working in a layer with locked transparency. All the similar pixels change to transparent and are converted to a layer if you click in the background.
4. Transparency with Background eraser tool:
- One of the best things about Photoshop is the background eraser tool. While maintaining the edges of an object in the foreground, you can easily erase the background.
- The centre, which is known as the hotspot, samples the colour in the centre of the brush and deletes the colour wherever it appears inside the bush.
In the end, it is not a lie to say that photoshop has made it so much easier to remove the background by just using the background eraser tool, eraser tool, or magic wand tool. Now every photo editor's or web designer's most crucial tool in editing is Photoshop, which has now become the easiest way to edit any picture.
3.2. Different Photo Editing Software 2020
We click thousands of images and still don't feel satisfied. The reason is imperfect. If the upper area of the picture is excellent, then the background would be blurred. In the case of software, we have to download it, and then only we can use it. But if you will search online for the image editor sites, then there are some of the heroes, which can instantly edit your image as you like.
Here you can check some of the best ones, which can edit your image instantly. Just upload your picture and swoosh!
1. GIMP:
- When you are talking about the best photo editors, then GIMP could top in this category. With its fantastic professional-quality functions, fine-tuning of images, fully integrated toolset, you can create a professional quality original masterpiece.
- If you have a high hand in Photoshop, then you can easily do it in the GIMP as well. At no cost, get a fair compromise for editing your pictures freely. Just try it!
2. Photoscape X:
To manage your photos in the archive, and edit your pictures most fantastically, you can depend on the Photoscape X.
- Now you can easily take your images to the next level with features like batch processing, a screen-capture tool, image viewer, great selection of filters, and effects.
- Other features like image transformation capability: give access to 1000 patterns to use, and 240 borders, frames and figures to add in your creativity.
3. Pixlr:
- Want to edit an image instantly, and don't have time to write in the sophisticated software? Then, my friend, you are in the correct place. You can use it via android, iPhone, or your browser. But first, you need to sign up to use the features.
- The best thing about Pixlr is that you will get tutorials on how to use it when it comes to the complicated features. If you are aware of the photo editing apps, then this is the best choice for you.
4. Instasize:
- Instasize could be specified as an image and video editor and could be termed as mobile-friendly. When it comes to image editing, like cropping or resizing, then this one is perfect for you.
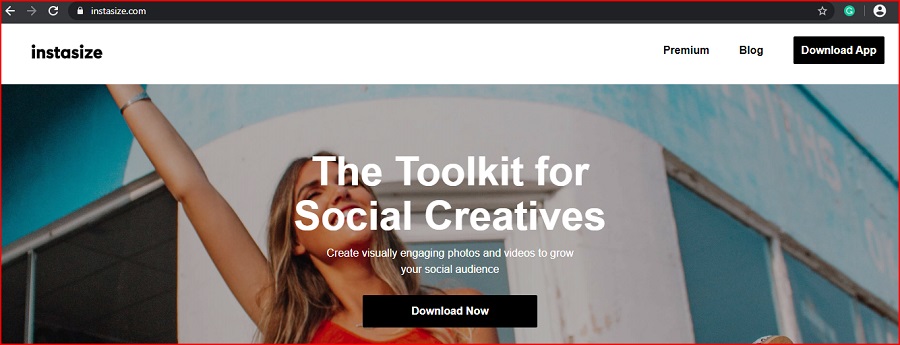
- The main thing about this app is that it lets you in the best features like manipulating sharpness and saturation, shadows and highlights, contrast, tint and warmth, exposure, and brightness. Other amazing tools like unique borders, beauty tools, text editor, and collage creator can create amazing pictures.
We can not hide the fact that some will appreciate these apps, and some will not. The reason is for some; these apps are not that much applicable as compared to their favourite apps. For some, it is all about Photoshop, and for some, it is about Canva. Different people have different sets of requirements. The majority of people have used the apps mentioned above for editing their pictures. So, at last, it is you who decides what is easy or what is difficult for you. Try out all the apps then decide based on their features.
4. Best Photo Editing Tool to Cut Out Background Instantly
A lot of photo editor has gained profit by adding the best effects to their images instantly. With the increase in demand to publishing photo instant, the editing apps have given a lot of benefits in providing better marketing or publish for the images. You can feel like seeing the product in front of you as it looks so pure, with so much clarity.
We can find a lot of image editing tools that can help you in removing the background or cut out the background of your images.
4.1. Microsoft Paint:
Paint.net is an app widely used for removing the background image. It has a variety of tools that can provide you with a lot of features to enhance your image.
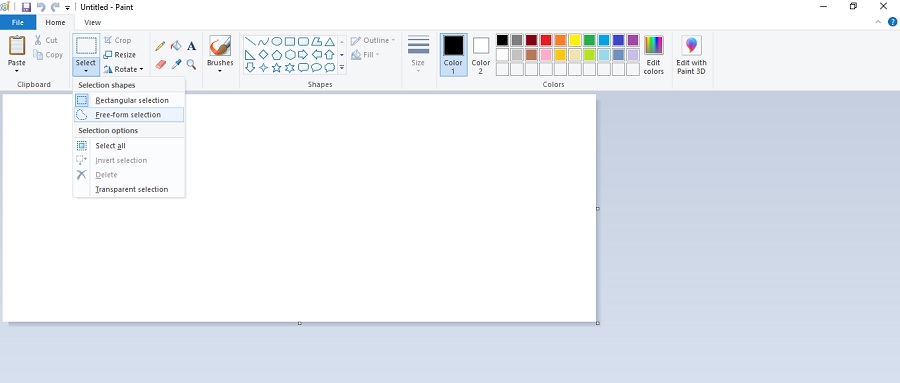
First, select the picture you want to edit. After the image gets loaded in your program, you have to go to your toolbar and select the portion you want to cut or remove then choose "Transparent Selection."
To make the background removal much more comfortable, make sure you should have a solid or white colour background.
You have to learn to use this app. Those who are using it know very well how this app has helped what and for more information visit the WikiHow page to remove the background using Microsoft Paint.
4.2. MacOS Preview:
Search for an application load your images and PDFs, then Preview for Mac OS is perfect for you. You might have used Preview for a long time if you are a Mac user. But here is a twist that can also apply for editing your images and removing the background.
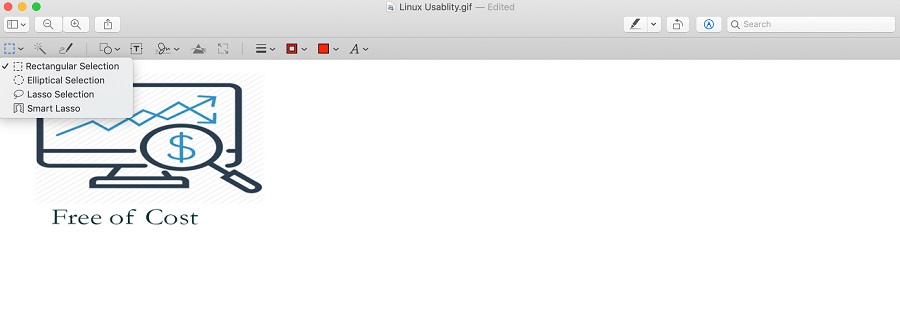
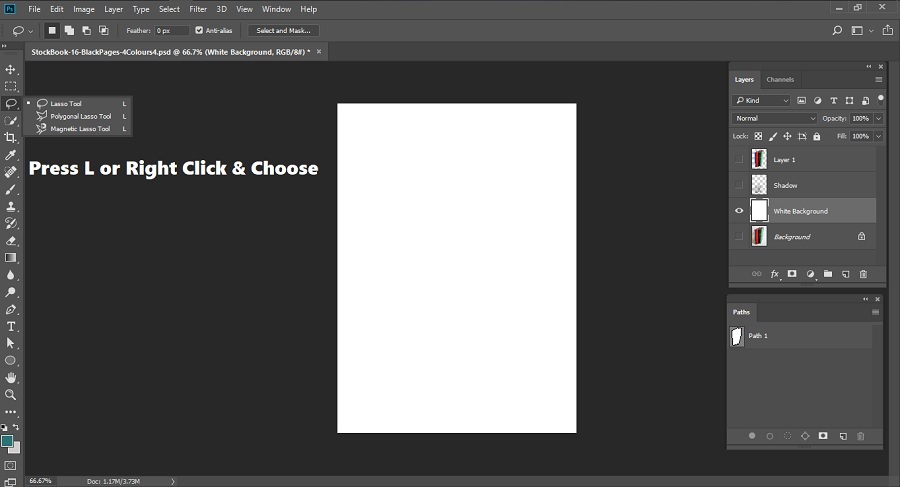
Now to use the Preview first, you have to find the "Select" menu. Under that, you can notice the background removing tools. After that, select the "Smart Lasso" tool, which allows you to draw quickly around your image with a blunt outline.
You can click on the "Invert Selection" and then -> "Edit" to remove the background. After that, you can click on the "Delete" option, which will quickly provide you with a transparent background by just showing the object.
4.3. GIMP (Open Source):
GIMP can also be called an alternative to Photoshop. First, load the image in which you want to change the background. To add transparency, you need to add an Alpha channel. Now to achieve this, you need to click on the Layer -> Transparency -> Add Alpha channel.
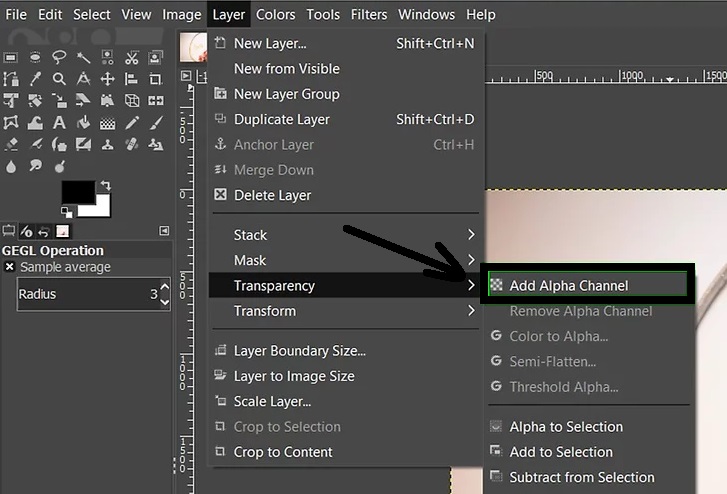
Now the time has come to delete the background. So far, from here, you have to click on the "Fuzzy Select Tool." Adjust your image by selecting and removing the context of the picture.
If you find any remaining spots which were left-over, then you can clean it by using the "Eraser Tool." To keep your background transparent, you have to make sure to "Save as" in PNG format before quitting.
For optimizing the product images on the web, background removal is the first step. You can try working on margins, alignments, consisting of cropping and resizing once you have mastered in background removal techniques. You can improve your business by learning about these tools. You don't need to depend on anyone to change your image effects, as it is so easy to learn
5. Do You Know How to Remove Background Automatically With Photoshop?
We all have gone through the phase where we take hundreds of pictures with our camera and still don't get the perfect one. Sometimes the background doesn't match with your subject. That's where you need the help photo editor tool like Photoshop.
Now, the world is running through photoshop, which is being used in the Media, television industry, web designing field, or just in photography. New effects are created through the photoshop design. The logos of the company which you see of big brands are made through the photoshop design.
Let's get to the points and see how a background removal tool can change the picture:
1. Adobe Photoshop has a Select Subject command, which makes life simpler for an image editor by automatically cutting out the unwanted subject from a photograph.
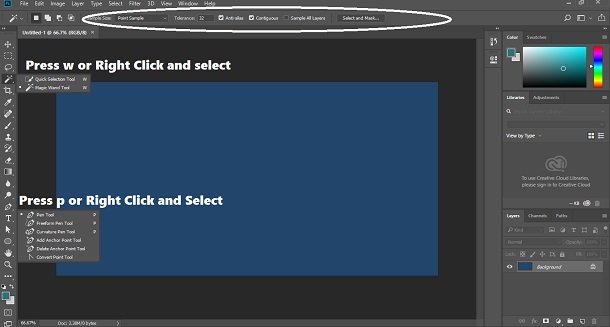
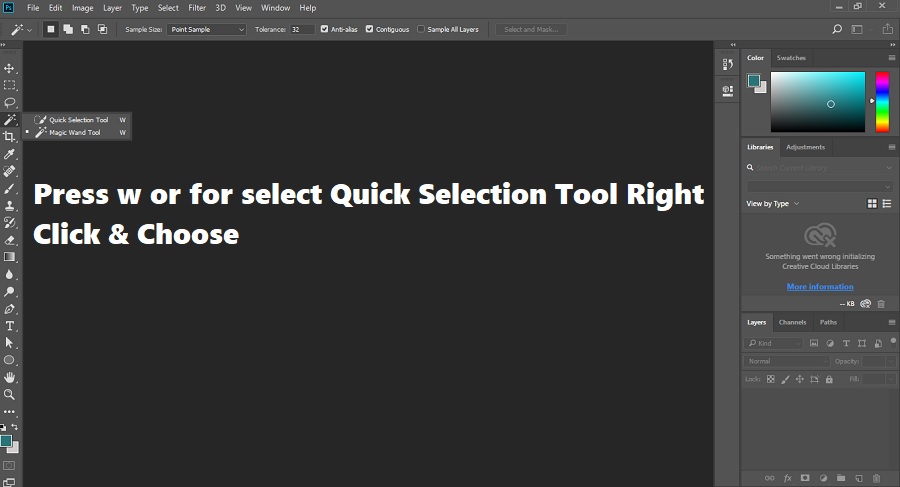
2. While editing the picture, you have to choose the subject and adjust the background of your image by using the Quick Selection tool and Magic wand tools.
3. To create well defined and high contrast edges in a picture, you can use the "Quick Selection Tool". Now, easily add or remove the subject you want.
4. You can easily swap the background using a magic wand and layers masks if your image includes the white background. Remember that through a layer mask, you can get back to your first experience as none of the background photo editings is permanent.
5. Learn how to remove the non-contiguous backgrounds by using the Magic wand tools. This tool can automatically adjust the background colour of the nonadjacent background with similar colours.
6. Play with the tolerance field and uncheck the contiguous to allow within your selection through the level of colour variation.
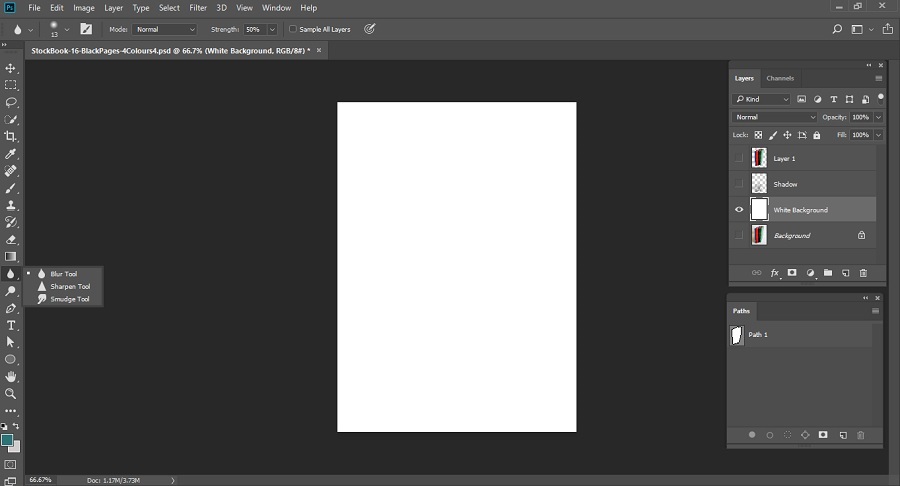
7. If you are having problems adjusting the background light or your lighting is not fitting according to the new background, then you can use the Blur filter to bring a more natural look to your picture.
5.1. Discover a new world behind Photoshop:
1. If you want to replace another picture background in one particular history, then you have to use the Patch tool.
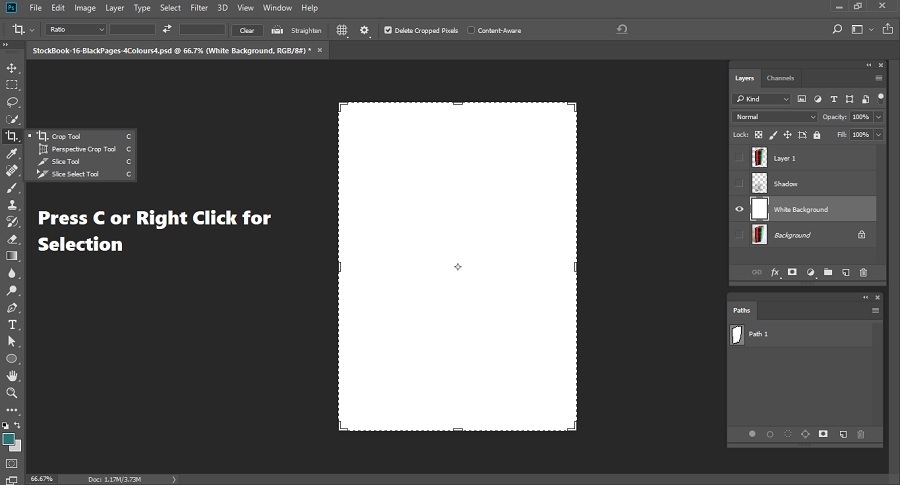
2. To add more composition, extend the canvas through the Crop Tool.
3. You can create your visual fairytales by combining the elements from many pictures and have your surreal collage.
Create your perfect snap by adding or removing the picture background or want to adjust the light. You can do all the photo editing through the adobe photoshop. There are so many ideas which you can create through photoshop.
If you are not satisfied with your image, or the picture was blurred in the background, and you want to add your rich history. Nowadays, the movie world is dependent on photoshop, which enhances every fine line of the skin, removes or adds other effects, which makes the picture just perfect.


